Eclipse IDE supports Git via a plugin EGit. In recent versions of Eclipse, EGit is already installed by default. I am using Eclipse Version: 2018-09 (4.9.0). To check if it is installed for you, go to Help> About Eclipse IDE > Installation Details, I see following entries:
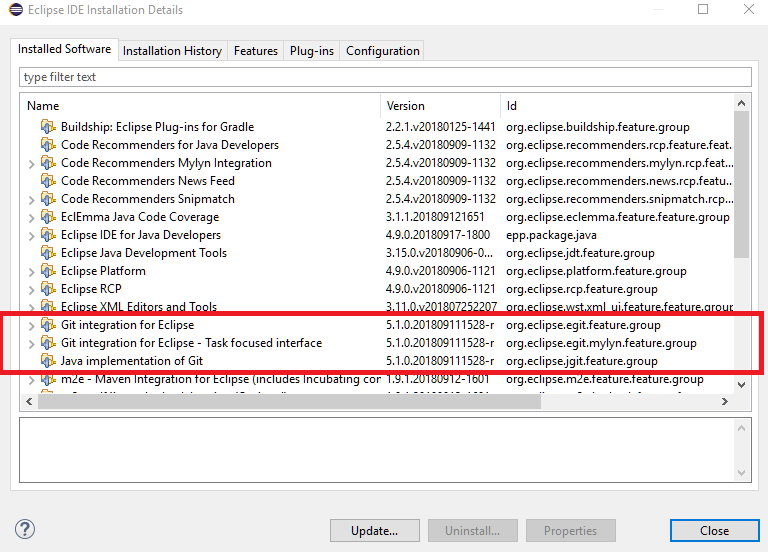
Let's get EGit update site link from here and try to install that, just to see if they have newer version.
Go to Help > Install New Software.. and enter the update site link (http://download.eclipse.org/egit/updates):
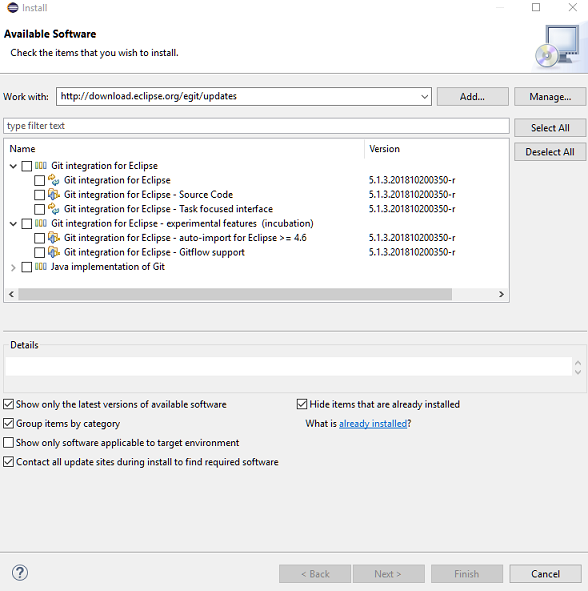
The update version of EGit is newer than the pre installed one, so let's install that. I'm selecting everything except for the experimental stuff:
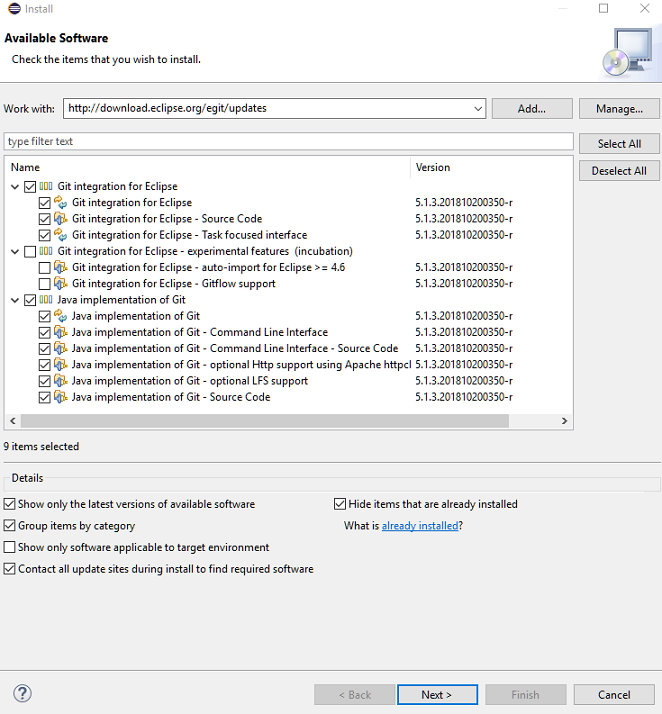
Click next and follow the rest of the steps.
Configuration
EGit comes with its own git distribution so we don't have to specify an external git path. The git default configurations can be viewed at Window>Preferences>Team>Git:
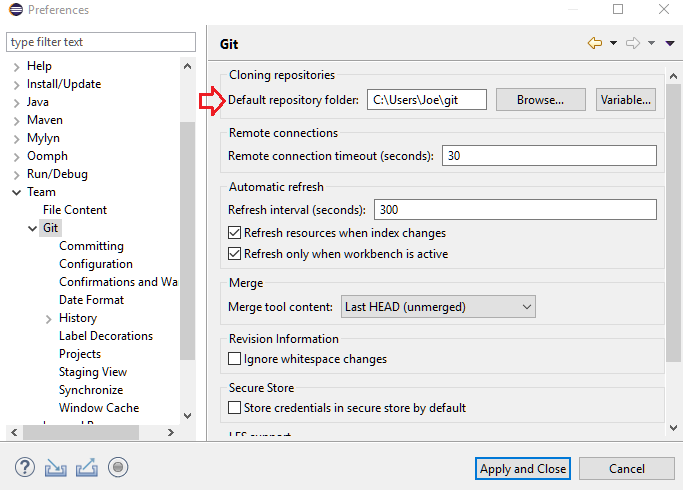
Git repository location
As seen above, Default Repository Folder value is set to under user home directory instead of under project folder. We can change it to a desired location. EGit recommends not to create Git repositories within Eclipse project or Eclipse workspace. According to EGit user guide:
It is probably not a good idea to make a project the root folder of your Repository.
- The reason is that you will never be able to add another project to this Repository, as the .project file will occupy the root folder; you could still add projects as sub-folders, but this kind of project nesting is known to cause lots of problems all over the place. In order to add another project, you would have to move the project to a sub-folder in the Repository and add the second project as another sub-folder before you could commit this change.
- It is a good idea to keep your Repository outside of your Eclipse Workspace.
There are several reasons for this:
......
Also check out how to specify a custom git repository location without any IDE.
External configurations
As I have git distribution installed externally, eclipse has imported some of the configurations from there.
In configuration folder my global user config (tutorial) are automatically imported:
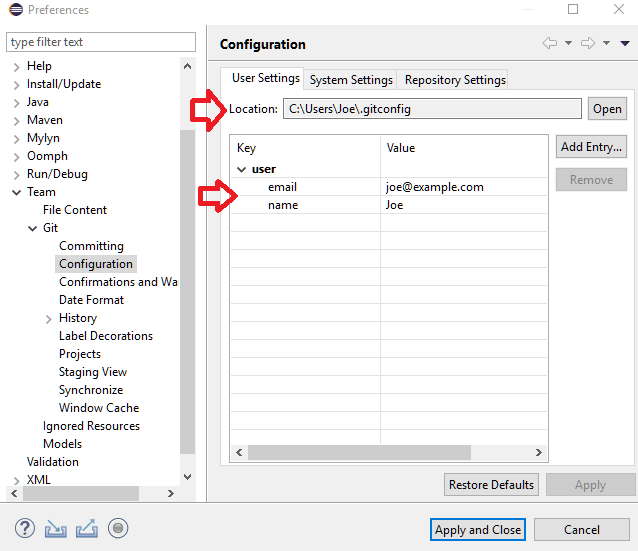
'Location' field also points where that configuration is saved. If you don't already have "email' and "name" entries as seen above, then you need to add them manually. Also check out tutorial on git configuration.
'System Settings' tabs has also automatically imported some system wide settings from the externally installed git:
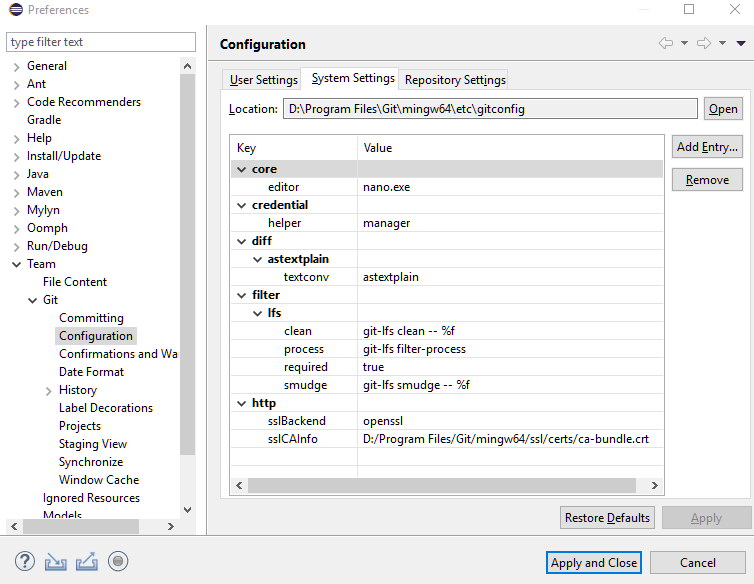
If you don't have these settings then that's not a problem, you can work without them.
Creating a Project
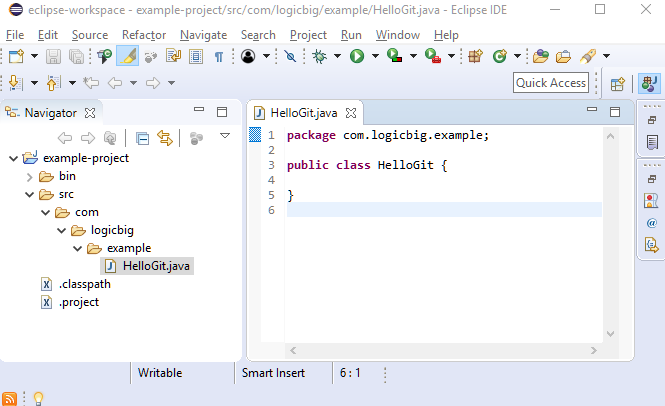
Let's create a Java Project which we will be adding to the Git repository:
Creating Git repository for project
Right click on project root>Team>Click on Share Project ...
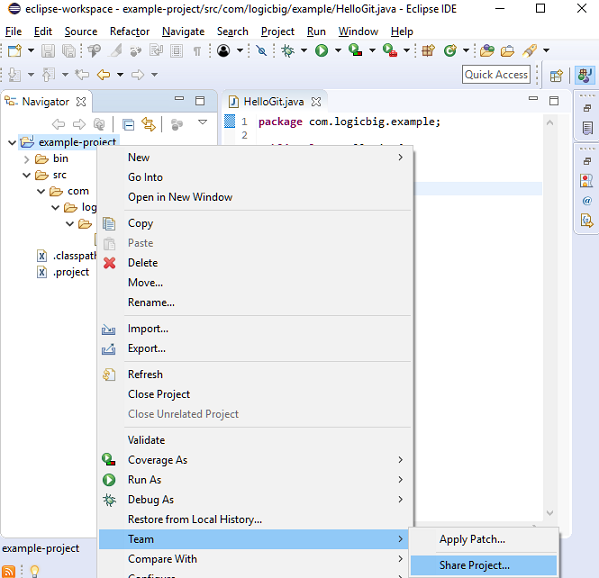
That will open 'Configure Git Repository' dialog (if you have other version systems installed as well, then you will have a selection dialog first, select Git there):
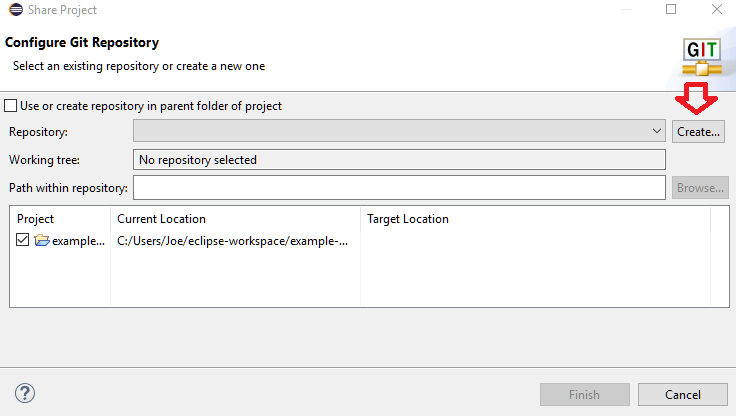
Click on Create...In the next dialog, you can select the repository location. I'm going to use the default one.

Click 'Finish' button.
Click 'Finish' again in 'Share Project' window.
Now we have created the git repository for our project already. You will see '?' signs on all files. Also there are '>' signs with folder names, it indicates changes which are neither in the staging nor in the repository.
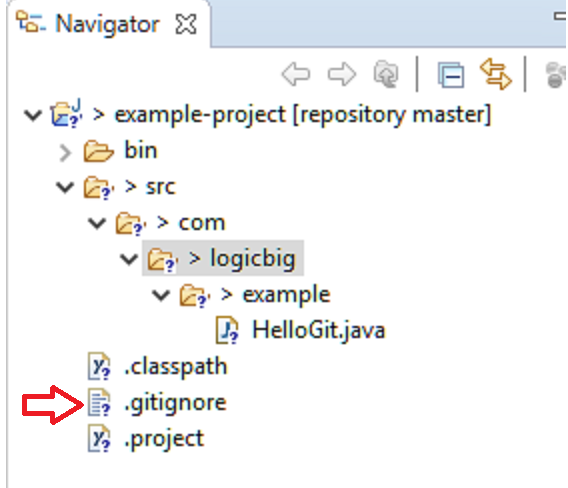
.gitignore file
Note that after creating repository for our project a new file '.gitignore' file appeared. This file is created by EGit. According to Git specifications this file should specify intentionally untracked files that Git should ignore (more info).
EGit added just one entry to .gitignore file:
/bin/
This entry is added due to the following setting:
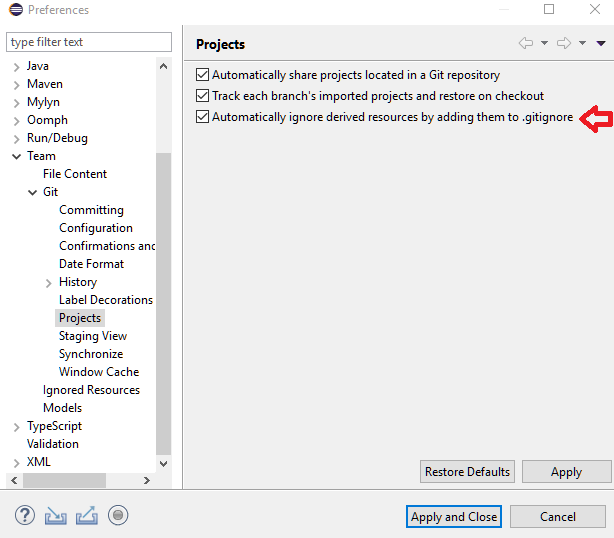
EGit views
Now let's open some EGit provided views which we will be working with in this example. Go to Window>Show View>Other>Git . Now select 'Git Reflog', 'Git Repositories' and 'Git Staging'.
Select 'Git Staging' and make sure the repository is selected as shown:
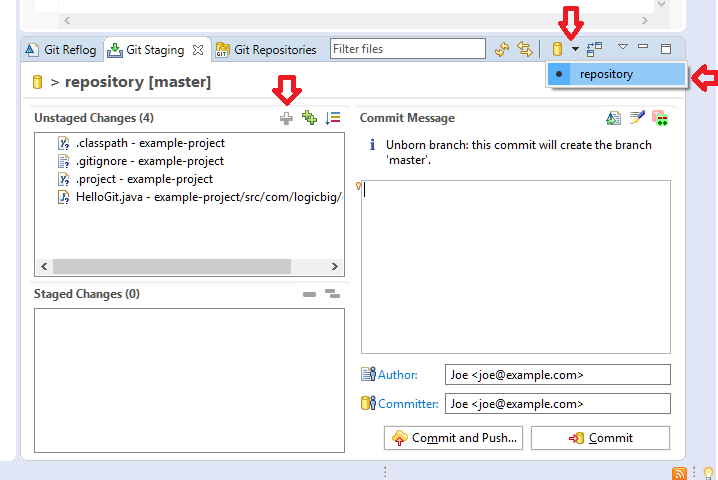
In 'Unstaged Changes' tab, we can select the files and click on '+' button to add them to staging area. We can also use right click menu.
Ignoring files
Let's first ignore the files which we will never add to the repository:
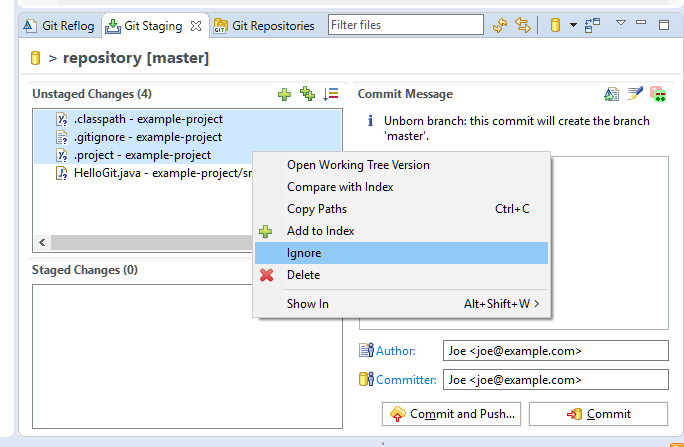
The ignored files will disappear from the 'Unstaged Changes' tab. The ? sign will also disappear in the Navigator for the ignored files.
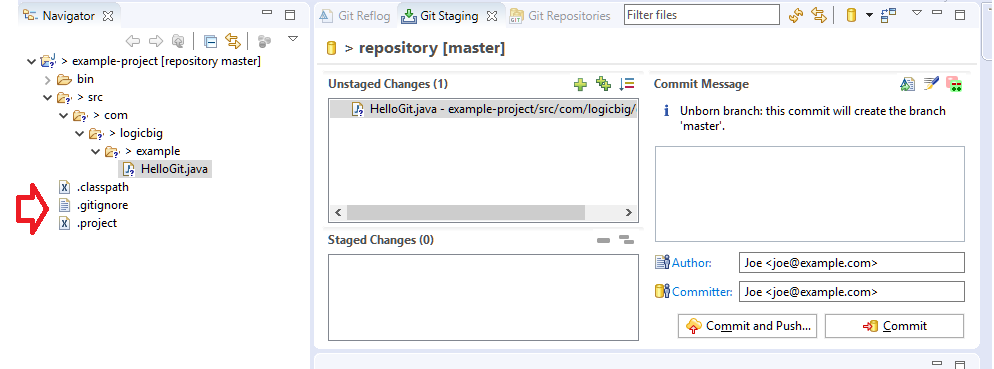
The updated .gitignore file:
/bin/
/.classpath
/.gitignore
/.project
Adding files to staging
Now let's add our Java source file to staging area:
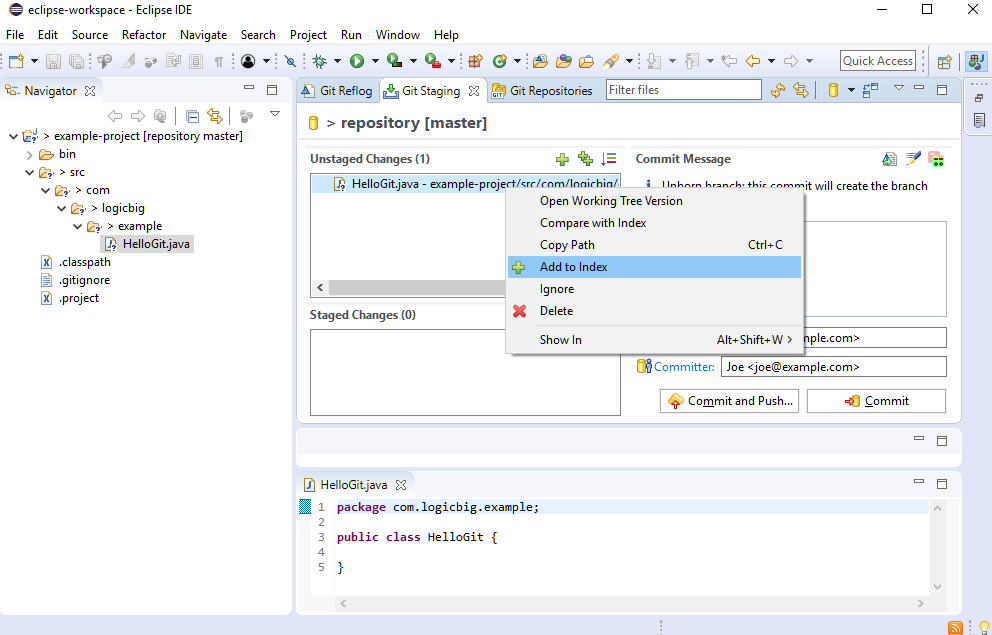
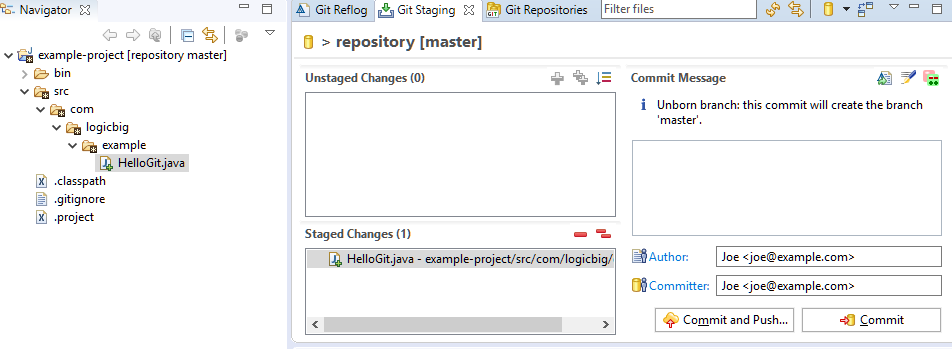
Now the file will show up in 'Stage Changes' tab and in navigator the added file will show plus overlay icon:
Committing
We can commit our staged changes by clicking 'Commit' button located on the bottom right, but before that we need to add commit message in the 'Commit Message' section:
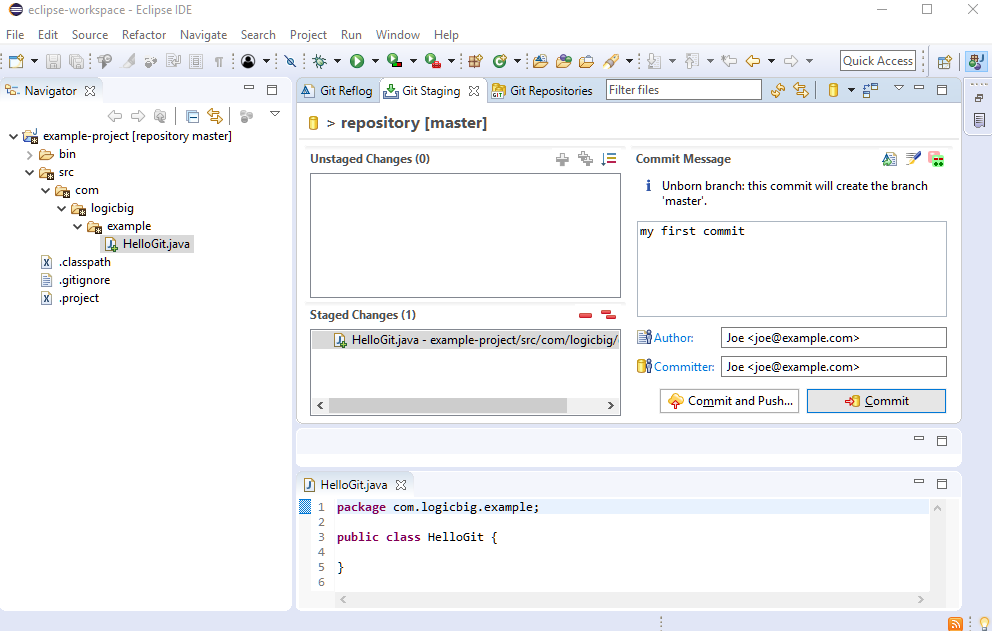
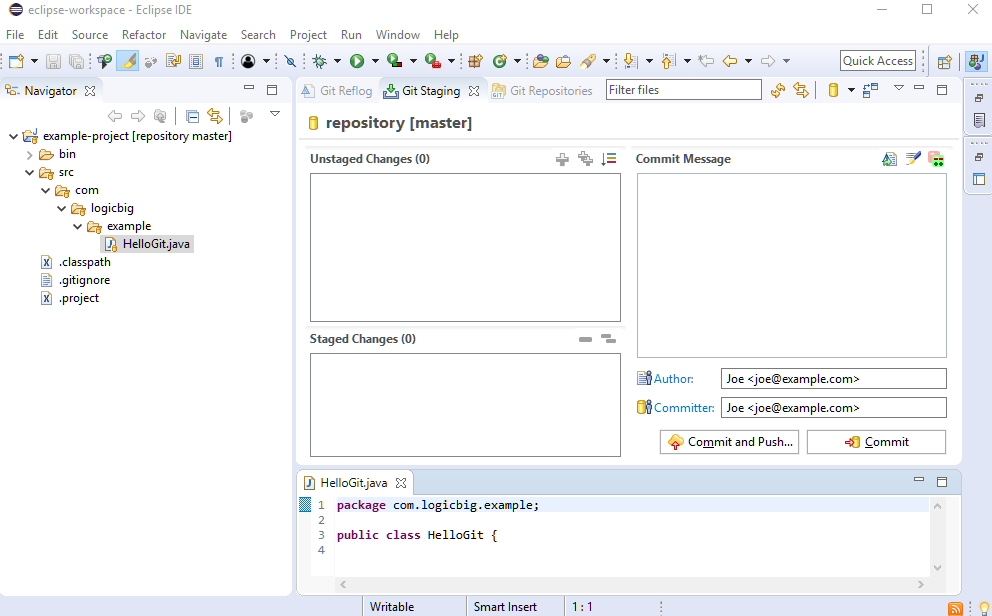
On commit, all fields will clear up and the ? sign on the Java file will be replaced by a repository icon:
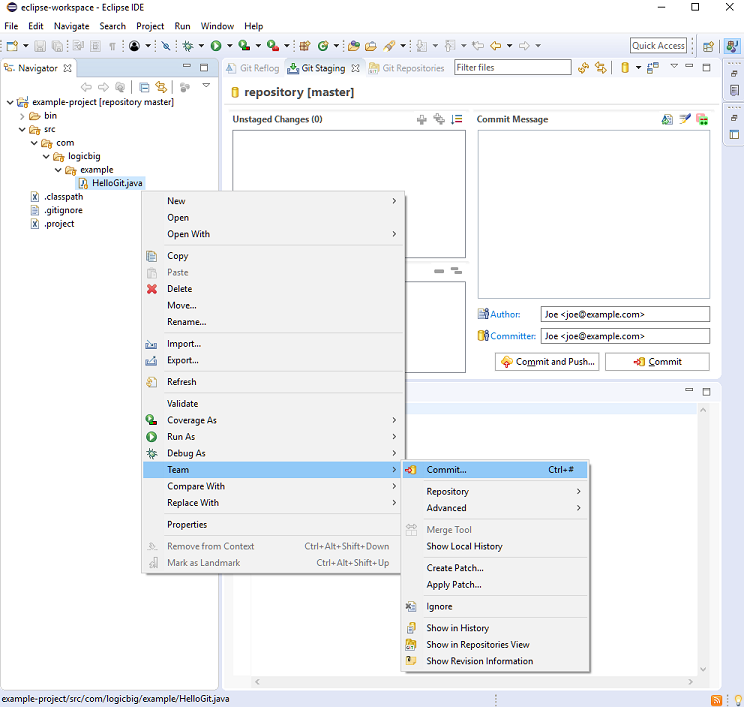
Project right click git menu
Most of the git operations can also be performed or initiated via right click menu as shown:
Making changes
Let's modify our Java file and save:
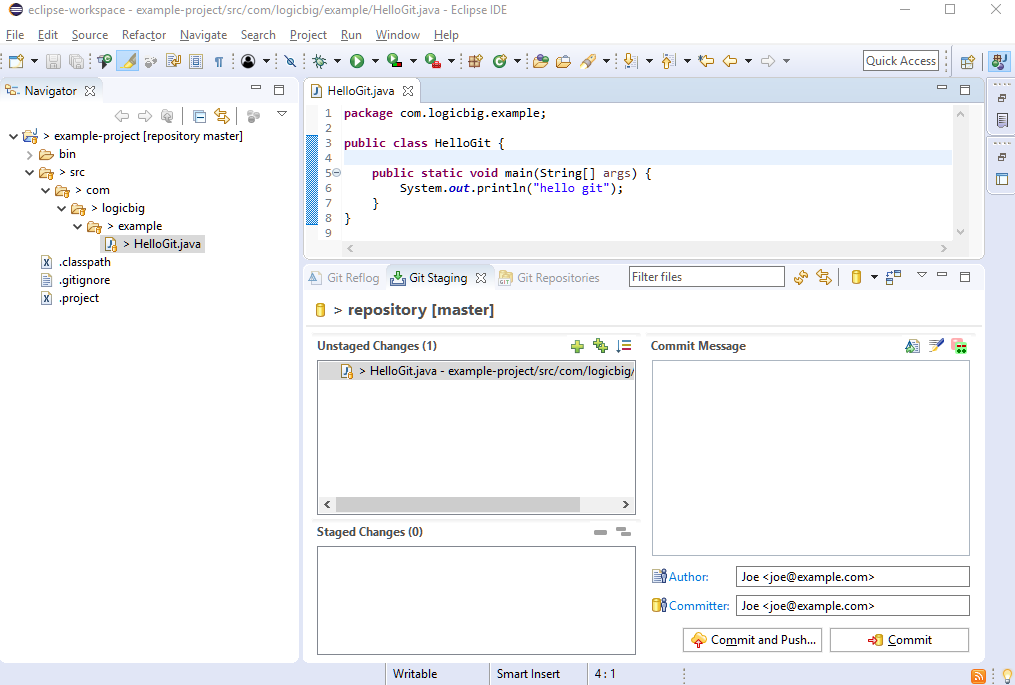
Now in Navigator, '>' sign appears in the dirty tree (here dirty means something that has changed). The sign > indicates a change which is not yet in staging.
The modified file appears in 'Unstaged Changes' pane as well. Let's add the file to staging.
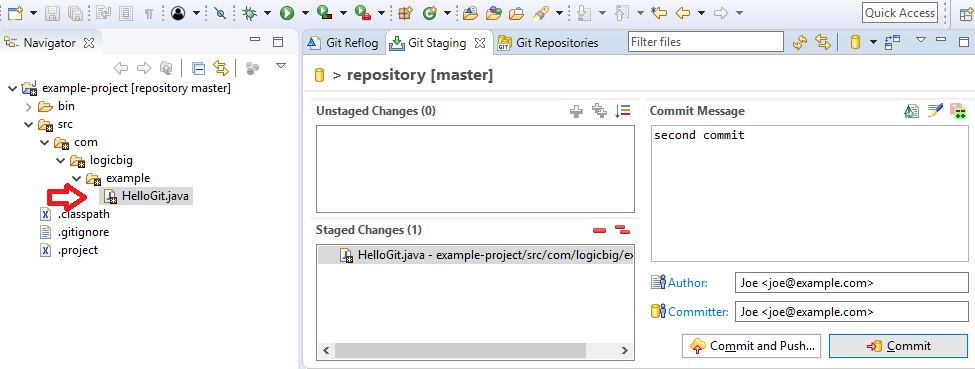
This time our modified Java file in Navigator, shows * (modified) overlay icon instead of plus sign (plus green sign only appears when we add new file to the staging area). Let's enter the commit message and click on 'commit'
Logs
Git Reflog View
RefLogs shows information returned by git reflog command. The reflogs are local list of hash references which are recorded due to the actions performed on the tips of branches. The command git log shows the commit logs.
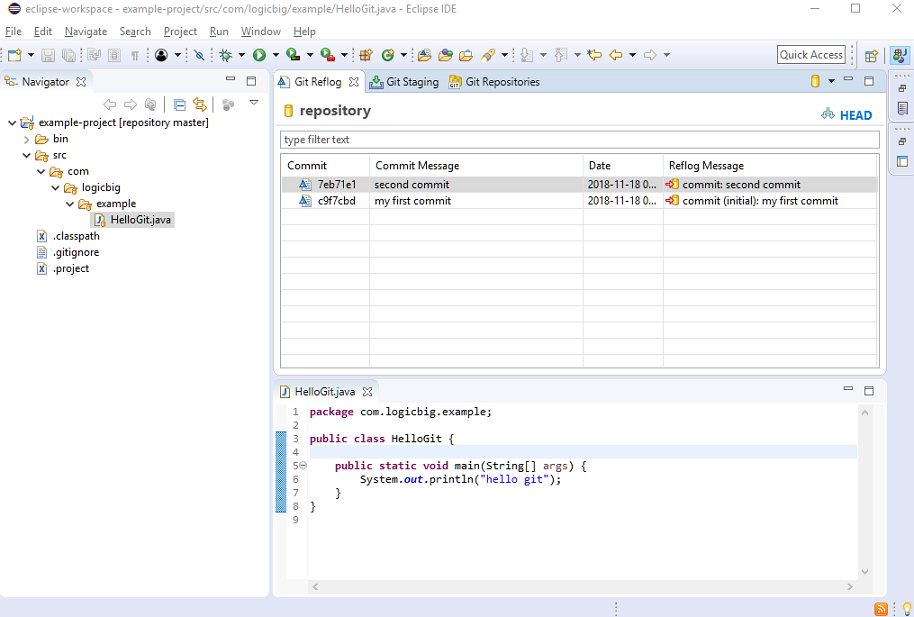
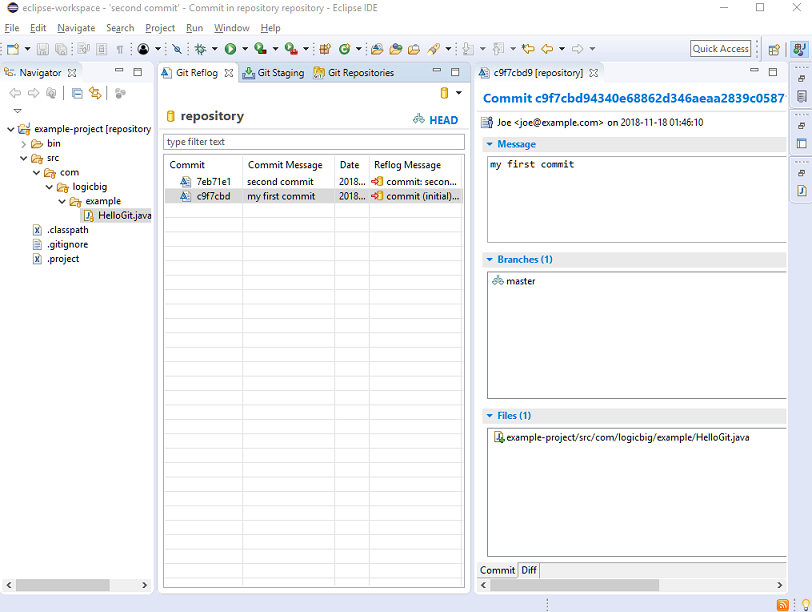
Double clicking on a commit record, shows the commit details as shown in three right side panes:
History View
History View allows to inspect change history.
We can access this view via Window>Show View>Other>Team>History
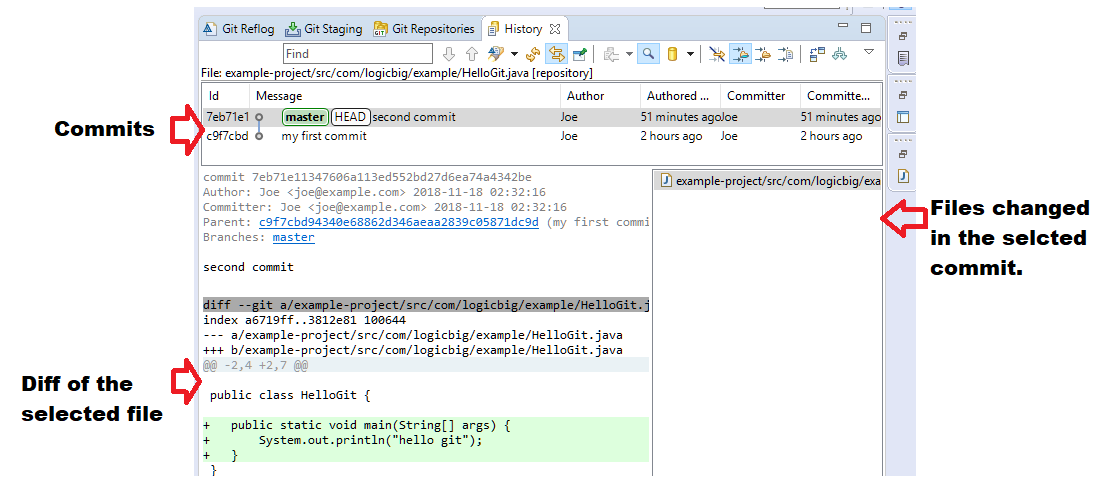
On selecting a commit row, lower panes get updated. The bottom right pane can have more than one files effected by the selected commit.
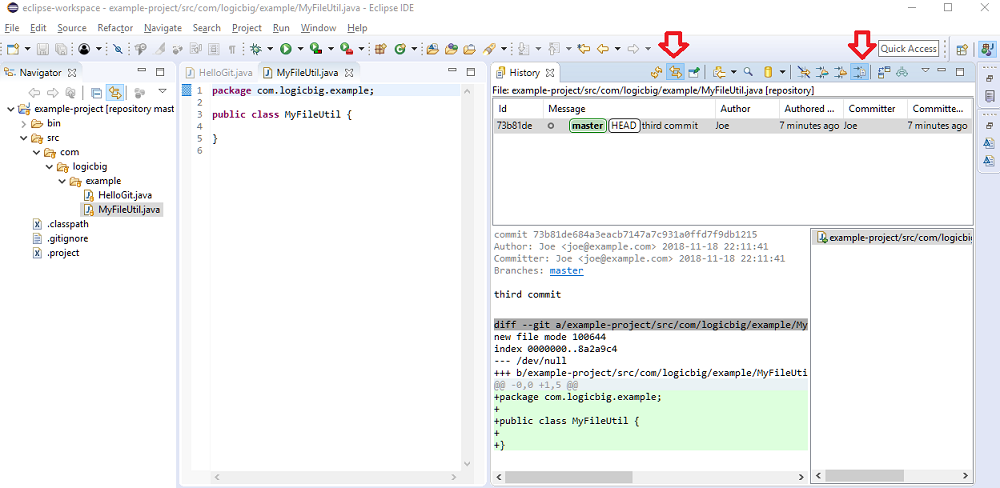
If we select Link with Editor and Selection and Show all changes of selected resource and its children icons, then that will link the editor, explorer and history views:
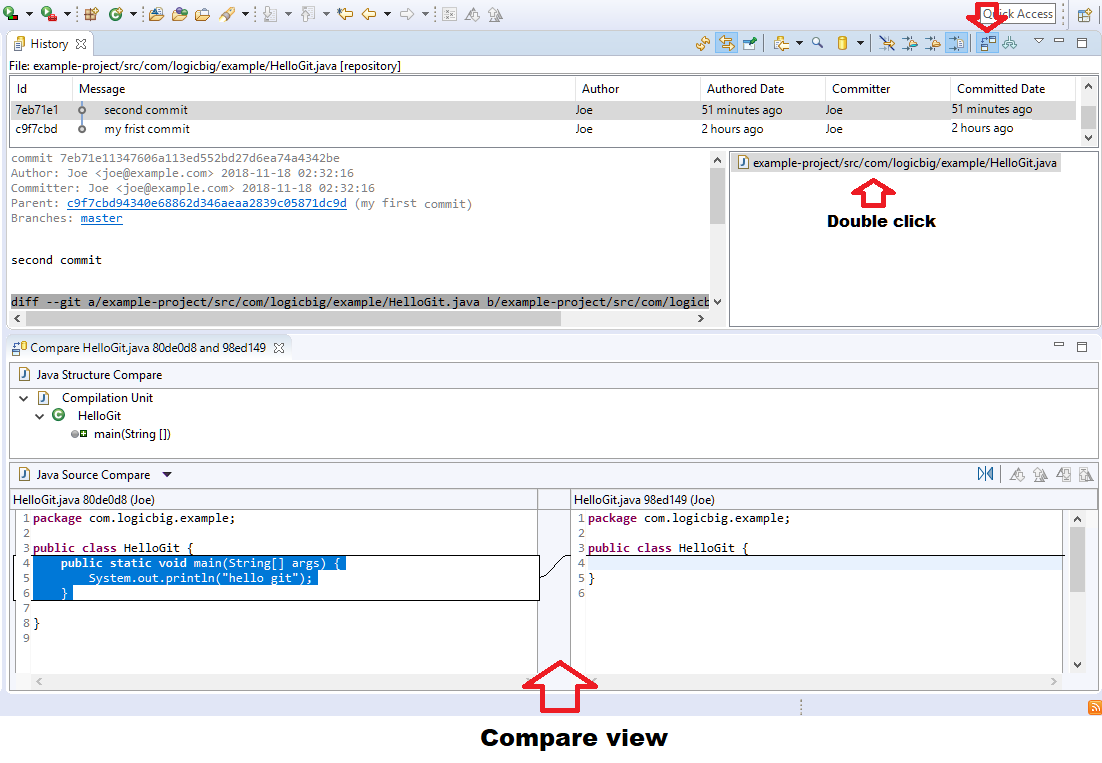
If we select "Compare Mode" icon and double click on a committed file then separate compare view is opened:
History view can also be used to perform various tasks like creating branches, creating patches, resetting commits etc which we will see in the coming tutorials.
|